Read More

Rendering Hacks

Rendering Hacks
Read More

Custom Brush

Create Custom Brushes
Read More

Light Effects

Ways to Light Effect
Read More

Hacks

Experimenting with Ibis materials
Read More

Another Light Effect

Soft Glow Magic

1/28/25

✩ Art Journey


 Art Journey

Here’s my art on early 2021, i used to play otome game called “obey me” and somehow i became strangely obsessed with demon lol. I actually started digi art on 2019 or something but getting a whole lot of art blocks because i have no idea what am i doing lololol TvT.

My Art Journey with Ibis Paint X: From 2019 to Now

When I first discovered Ibis Paint X back in 2019, I was just a curious beginner. It wasn’t my first time dabbling in digital art, but let’s just say I didn’t know what I was doing. The app was packed with features I had no clue how to use, and at first, it felt overwhelming. But over time, it became my favorite tool for creating art, and the journey of improving has been nothing short of exciting.

2019: The Year of Scribbles

When I started, my “art” was mostly random lines and experimental scribbles. I played around with brushes, layering tools, and filters, not really knowing what I was doing. The variety of brushes amazed me—even though I mostly stuck to the default ones. My layers were chaotic (naming them? What’s that?), and I thought the undo button was the best thing ever invented.

Learning the Features, One Step at a Time

As I got more comfortable, I started exploring Ibis Paint X’s features in more depth. Clipping layers? Mind-blowing. I finally learned how to color inside the lines without having to be overly careful. The stabilizer became my best friend, especially since I had shaky hands back then. And don’t even get me started on the blending modes—I felt like I unlocked a superpower when I figured out how “Multiply” worked for shading!

Finding My Style

By 2020, I was experimenting with different art styles, and Ibis Paint X made it so easy to try new things. The ability to customize brushes opened up a whole new world for me. I spent hours tweaking the settings to get that perfect pencil texture or soft airbrush effect. The app made digital art feel accessible, even for someone like me who didn’t have a fancy tablet or expensive software.

Tackling Challenges

Of course, it wasn’t all smooth sailing. There were times when my art looked stiff, and I’d get frustrated trying to fix anatomy or lighting. But every mistake taught me something new. I started watching tutorials and reading tips to better understand features like the lasso tool and perspective grids. Slowly but surely, I got the hang of them, and it felt so rewarding to see my progress.

Where I Am Now

Fast forward to today, and Ibis Paint X is still my go-to app for creating art. The time-lapse recording feature has been such a fun way to document my process and see how much I’ve grown. My layers are now (mostly) organized, I’ve memorized my favorite brush settings, and I can confidently say I’m no longer afraid to experiment.

Looking back, it’s crazy to see how far I’ve come. What started as random scribbles has turned into a passion for creating pieces I’m proud of. Ibis Paint X wasn’t just a tool for me—it became a part of my art journey, teaching me that improvement comes with patience, practice, and a willingness to learn.

So, to anyone starting out with digital art or feeling stuck: keep going. Experiment, make mistakes, and explore every feature, no matter how confusing it seems at first. You never know how much you can grow until you try!

Here’s to more art and more growth!


Read More

1/21/25

✩ Easy Grid


✩ How to Use the Grid Feature in ibis Paint for Perfectly Proportioned Drawings


Have you ever struggled to get proportions right when drawing? Or maybe you’ve wanted to recreate an image but found it tricky to keep everything aligned? The grid feature in ibis Paint is here to save the day! This handy tool is perfect for sketching, replicating references, and improving the overall balance of your artwork. In this blog, I’ll guide you step-by-step on how to use the grid feature in ibis Paint—and you’ll be surprised how easy it is!


Step 1: Activate the Grid


To get started, open your canvas in ibis Paint. Then follow these steps:

1. Tap on the Gear Icon (Settings) in the toolbar at the top.

2. Scroll down and find the Grid/Axis Settings option.

3. Turn on the Show Grid toggle, and voila! A grid will appear on your canvas.


You can adjust the grid size by dragging the slider under the grid settings. A smaller grid is great for detailed work, while a larger grid is perfect for rough sketches or simple layouts.


Step 2: Customize Your Grid


ibis Paint lets you tweak the grid to match your needs. Here’s how:

Grid Color: Change the grid lines to a color that contrasts with your canvas or artwork. This makes it easier to see.

Grid Size: Adjust the spacing between the lines for precise measurements.

Subdivisions: Add smaller grid lines within the main grid for even finer details.


Tip: If you’re working on a photo or a reference image, matching the grid size to the reference can help you replicate the proportions perfectly.


Step 3: Use the Grid to Sketch


Now that your grid is set up, use it as a guide while sketching. Here are a few ideas on how to maximize its potential:

Replicating References: Import a reference image, enable the grid, and use the same grid size on your canvas. Draw each section of the grid one at a time to keep everything proportional.

Symmetry and Alignment: Use the grid lines to ensure your elements (like eyes, limbs, or objects) are aligned and balanced.

Scaling Up or Down: Want to create a larger or smaller version of an image? Divide both your reference and your canvas into grids, then replicate each section accordingly.


Step 4: Hide the Grid for Final Touches


Once you’ve finished your rough sketch or layout, you can hide the grid to refine your artwork. Simply go back to the Grid Settings and turn off the Show Grid toggle. This way, your canvas looks clean, and you can focus on adding details or coloring.


Why Use the Grid Feature?


Using the grid feature isn’t just for beginners—it’s a powerful tool for artists of all levels! It helps:

Improve accuracy and proportions.

Simplify complex references.

Create balanced and symmetrical compositions.

Save time when planning layouts or scaling drawings.


Pro Tip: Combine Grids with Layers


For even better results, use grids alongside layers. For example, you can:

Add the grid on one layer while keeping your sketch on another.

Lock the grid layer to avoid accidental changes.

Use a layer for guidelines and sketch freely without losing structure.


Using the grid feature in ibis Paint is like having a personal assistant to keep your drawings organized and on point. Whether you’re a beginner practicing proportions or a seasoned artist creating detailed illustrations, the grid tool can elevate your art effortlessly.


So, what are you waiting for? Open ibis Paint, turn on the grid, and let your creativity flow!


If you have any tips or creative ways to use the grid feature, feel free to share them in the comments below. Happy drawing!


Read More

1/13/25

✩ Experimenting With Ibis Materials


Do you see the hand in my art? Looking good ain’t it? There’s just too many features on ibis paint x but ‘materials’ is one of my favorite. It’s very convenient for newbies or beginners on digital art.

In this feature, you can find a lot of materials you can use for reference or trace for practice purposes. 

✩ Discover the Power of the Materials Feature in Ibis Paint

If you’ve been exploring Ibis Paint for a while, you’ve probably noticed the Materials feature sitting quietly in the app. But did you know it’s one of the most versatile tools that can take your artwork to the next level? Whether you’re creating digital paintings, comics, or design projects, materials are a game-changer. Let’s dive into what this feature is all about and how to make the most of it.


✩ What Are Materials in Ibis Paint?


Materials in Ibis Paint are essentially pre-made assets, textures, and patterns that you can overlay onto your canvas. Think of them as shortcuts to enhance your art without having to draw every detail by hand. From decorative patterns to natural textures, materials can be used for backgrounds, effects, or even small details in your drawings.


✩ Where to Find Materials


To access the Materials library:

1. Tap the Materials button on the top of your canvas (it looks like a square with a diagonal pattern).

2. Browse through the categories. You’ll find a wide range of options like textures, patterns, manga effects, tones, and more.


✩ Types of Materials You Can Use


Here are some categories you’ll find and their uses:

1. Textures

Perfect for adding depth to flat areas of your artwork.

Examples: Paper textures for a traditional look or grunge textures for a gritty feel.

2. Patterns

Add repeating designs effortlessly.

Examples: Polka dots for a retro vibe or floral patterns for decorative touches.

3. Manga Tones

A lifesaver for comic and manga artists.

Examples: Shading tones, line effects, and speed lines to add drama and emotion.

4. Decorative Elements

Great for instant detail work.

Examples: Lace patterns, stars, or geometric shapes to enhance the background.


✩ How to Use Materials

1. Overlay a Material

Select a material from the library and tap it to apply.

It will appear as a new layer on your canvas. You can move, resize, or rotate it to fit your artwork.

2. Blend It

Play around with blending modes (like Multiply, Overlay, or Add) in the layer settings to make the material blend seamlessly with your art.

3. Adjust Opacity

Lower the opacity for subtle effects, like adding texture without overpowering the piece.

4. Erase or Mask

Use the Eraser Tool or a clipping mask to remove parts of the material that don’t fit your design.

5. Combine Materials

Don’t be afraid to layer multiple materials for complex effects. For instance, combine a texture with a pattern for a rich, layered look.


✩ Why Use Materials?

Save Time: Instead of drawing every small detail, you can use materials as shortcuts.

Add Realism: Materials like paper, fabric, or metal textures add a touch of realism.

Enhance Composition: Patterns and tones can create visual interest and guide the viewer’s eye.

Perfect for Beginners: Not confident with details yet? Materials can fill the gaps while you practice.


✩ Tips for Using Materials Creatively

1. Customize Colors: Apply a hue adjustment to make the material match your color scheme.

2. Mix and Match: Use different materials together to create a unique look.

3. Don’t Overdo It: Materials are great, but using too many can clutter your art. Use them intentionally to support your vision.


✩ Conclusion


The Materials feature in Ibis Paint is an incredible tool that can elevate your art with minimal effort. It’s especially useful when you’re short on time or want to experiment with textures and effects. So next time you’re working on a piece, take a moment to explore the Materials library—you might just find the perfect addition to make your art stand out!


Happy drawing!


Read More

Social Profiles

Twitter

Get to know the creator

Blog Profile

My photo
Hai there! i'm nai, and currently a highschool stud on my senior year

Popular Posts

Categories

Blog Archive

Search This Blog

Powered by Blogger.

Pages - Menu

Recent Post

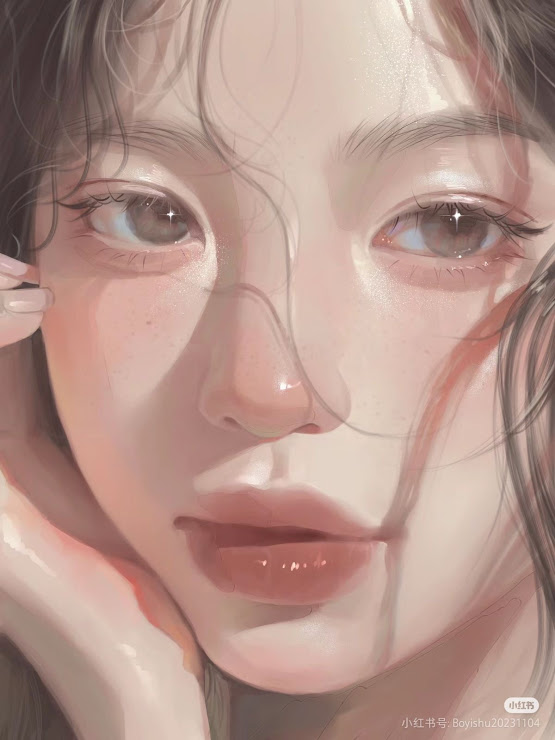
☆ Way To Skin Texture

Copyright © The Lazy Artist’s Guide to Digital Art Hacks (Ibis Paint x) | Powered by Blogger
Design by Lizard Themes | Blogger Theme by Lasantha - PremiumBloggerTemplates.com