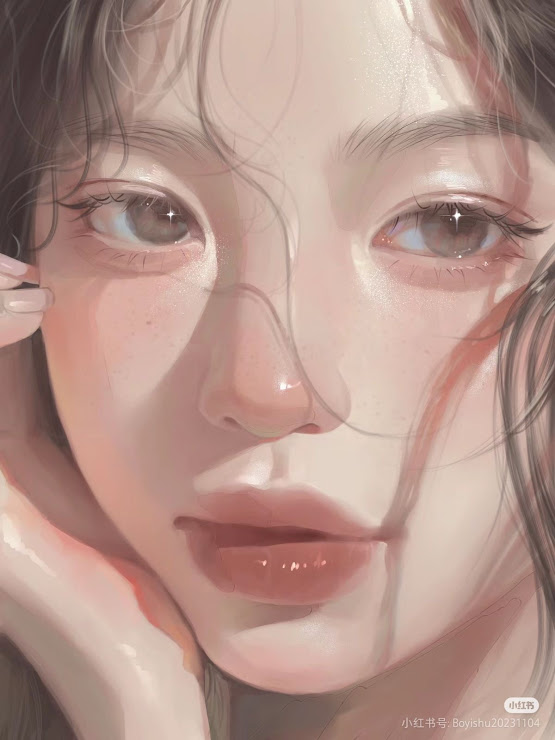
Nai’s here! And what you see up here is one of my artworks. Here i want to give some tutorial about how to do light effects like this on ibis paint x.
Here’s a simple and natural tutorial for creating a light effect using the Add layer mode in Ibis Paint:
✩ How to Create Stunning Light Effects Using the Add Layer Mode in Ibis Paint
1. Set Up Your Canvas
Open your artwork or create a new canvas. Make sure the area where you want the light effect is visible and ready to work on.
2. Add a New Layer
• Tap the Layer icon (looks like two squares stacked on top of each other).
• Create a new layer above your artwork.
3. Change the Layer Mode to Add
• Select the new layer.
• Tap on the layer settings (the drop-down that says “Normal” by default).
• Scroll down and select Add. This mode makes colors on the layer appear brighter and creates a glowing effect.
4. Pick a Bright Color
• Tap the Color Wheel and choose a bright color like white, yellow, or a neon tone depending on the effect you want (e.g., white for a glow, blue for magic, etc.).
• The brighter the color, the stronger the light effect will be.
5. Use a Soft Brush
• Open the Brush menu.
• Choose a soft brush, like the “Airbrush (Soft)” or “Blur Airbrush.” These brushes help create smooth, glowing edges.
• Adjust the brush size to suit your design. Larger brushes are great for ambient light, while smaller ones work for details.
6. Add the Glow
• Start painting on your Add layer. Focus on the areas where the light should be strongest (e.g., highlights, light sources, or glowing objects).
• Build up the glow by layering strokes. You can reduce the opacity of the brush if you want more control over the intensity.
7. Refine the Effect
• If the glow is too intense, lower the layer’s Opacity (adjustable in the Layer menu).
• To soften the edges further, use the Blur Tool on areas that feel too sharp.
8. Optional: Add Details
• Create another Add layer and use smaller brushes to add details like sparkles, flares, or streaks of light for a more dynamic look.
• Use colors like white or a slightly lighter version of your base glow color.
9. Final Adjustments
• Review your effect. You can add more Add layers for different parts of your artwork or experiment with blending modes like Overlay or Soft Light for additional depth.
• When satisfied, merge your layers (optional) and save your work!
✩ Pro Tips
• Use Gradients with Add layers for natural light transitions.
• Combine Add layers with darker tones in Normal layers to create contrast and make the glow pop even more.
• Experiment with the Gaussian Blur filter to soften the glow.
You’re done! With the Add layer mode, your light effects will stand out beautifully, giving your art a professional, glowing touch.


