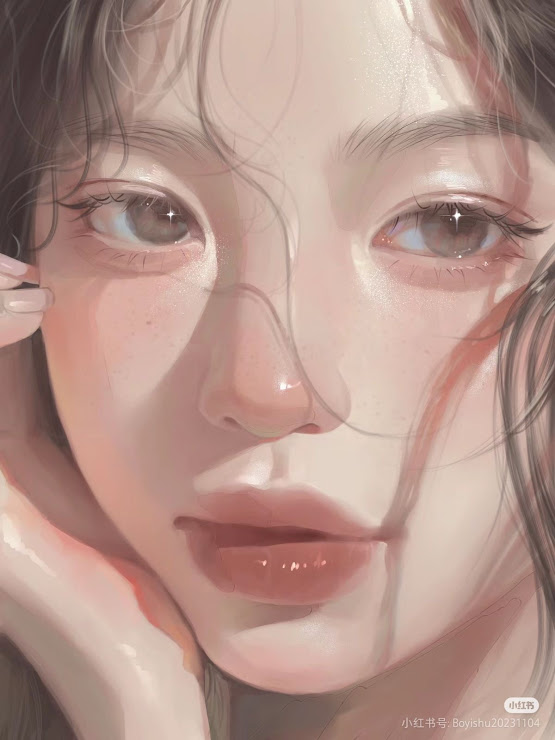
☆ Way To Skin Texture
Cr Art : Pinterest
Hello everyone! Nai’s here. Now, let’s delve into techniques for creating realistic skin textures in Ibis Paint X, enhancing the lifelike quality of your digital portraits.
1. Laying the Foundation
Begin by establishing a solid base for your skin tones.
Steps:
- Base Color:
- Choose a mid-tone color that represents the average skin tone of your subject.
- Fill the skin areas uniformly using the “Bucket Tool” or a standard brush.
- Layer Organization:
- Create separate layers for different aspects of the skin, such as base color, shadows, highlights, and textures.
2. Shading and Highlighting
Add depth and dimension to the skin by incorporating shadows and highlights.
Steps:
- Shadows:
- On a new layer set to “Multiply” blending mode, apply a slightly darker tone to areas that naturally receive less light.
- Use a soft brush to blend the shadows smoothly into the base color.
- Highlights:
- Create another layer set to “Add” or “Overlay” blending mode.
- Apply lighter tones to areas where light hits the skin directly, such as the forehead, nose bridge, and cheekbones.
- Color Variations:
- Introduce subtle hues of reds, blues, or yellows to mimic the natural variations in skin tone.
- This can be achieved by lightly brushing these colors onto the skin and blending them appropriately.
3. Adding Skin Texture
To achieve a realistic appearance, it’s crucial to simulate the fine textures of human skin.
Steps:
- Texture Brushes:
- Utilize specialized texture brushes available within Ibis Paint X or import custom brushes designed for skin detailing.
- Lightly apply these textures over the skin areas to replicate pores and subtle imperfections.
- Noise Addition:
- On a new layer, fill the area with a neutral gray color.
- Apply a noise filter to this layer to create a grainy effect.
- Set the layer blending mode to “Overlay” and adjust the opacity to achieve a subtle skin texture.
- Detail Refinement:
- Zoom into your artwork and manually add fine details such as freckles, moles, or slight discolorations using a small, soft brush.
4. Blending and Final Touches
Ensure all elements of the skin blend seamlessly for a cohesive look.
Steps:
- Smooth Transitions:
- Use the “Smudge Tool” or a soft airbrush to gently blend between shadows, mid-tones, and highlights, ensuring there are no harsh lines.
- Layer Adjustments:
- Fine-tune the opacity and blending modes of your layers to achieve the desired intensity of shadows, highlights, and textures.
- Overall Color Correction:
- Apply adjustment layers or filters to harmonize the skin tones with the rest of your composition, ensuring a natural and realistic appearance.
By following these steps, you can create lifelike skin textures in your digital portraits using Ibis Paint X. Happy illustrating!
For a visual demonstration, you can watch the following tutorial:
https://youtu.be/yZP4Wz7reaI?si=NA6CAo_RgA-


wahh bermanfaat bgtt kakk😻
ReplyDeletelucuuu bangeett template nyaaa 💐🍓
ReplyDeletewaww, ada tutorial youtubenyaa
ReplyDeleteWoww lucu banget 💖✨🌻
ReplyDeletewaw keren sekali😍😍
ReplyDelete